Eddy Current Testing for Hardness, Case Depth & Material Verification

Amid the intricate landscape of mass part production, overseeing heat treatment outcomes presents a formidable puzzle. Ensuring the precise case depth and hardness is paramount to meeting the rigorous quality standards demanded by the final product. However, traditional approaches involving destructive sampling not only incur substantial personnel and financial costs but are also adept at identifying statistically distributed defects alone. Herein lies the issue: During heat treatment processes like furnace or induction hardening, isolated accidents transgressing statistical norms can occur. These "unexpected" anomalies, however, elude conventional sampling methods. A paradigm shift towards 100% testing becomes imperative for the reliable detection of these elusive deviations.
Increased inspection reliability with eddy current structure testing and PMFT technology for surface hardness, case depth, intermediate structure, material composition
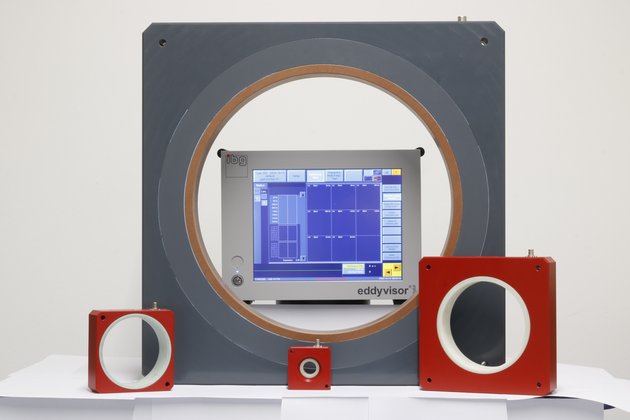
Step forward Eddy Current Structure Testing, fueled by the established Preventive Multi-Frequency Technology (PMFT) and Simultaneous Harmonic Analysis by ibg. This synergy promises unparalleled test reliability, especially in the realm of eddy current testing and 100% inspections. The outcomes of heat treatment, even in serial testing scenarios, can now be efficiently, promptly, and dependably monitored. Even those unforeseen aberrations are pinpointed with utmost certainty. With eight test frequencies of the fundamental wave and meticulous analysis of two PMFT harmonics, the zenith of reliability is achieved. The applications span widely, encompassing eddy current testing for surface hardness, case depth, intermediate structure, material composition, and more.
Efficient Calibration and Precision in Testing with Streamlined Good Parts Methodology
Calibration is streamlined – it's achieved solely through "good" parts. By introducing 10 to 20 known, correct heat-treated parts, tolerance zones materialize automatically. Subsequent eddy current signals are then compared against these benchmarks. This calibration methodology eliminates the need for contrived defects, expediting the process while ensuring precision. With swift test speeds and user-friendly configuration, initiating a new test task is a matter of moments. Another edge lies in the multi-dimensional analysis of ibg's eddy current test instruments. Individual tolerance zones are tailored for each test frequency. A unanimous fulfillment of these zones implies the tested part is impeccable. Conversely, even a solitary unmet tolerance zone flags the part as non-compliant.
Eddy current tests inherently provide binary results – a yes or no verdict. While they excel at detecting slight variations within a group of parts, they don't illuminate the reasons behind these disparities. For parts that fall short, supplementary tests, such as metallurgical examinations or classic hardness tests, are recommended to decipher the root causes.
Revolutionizing Quality Control Across Diverse Components with Precision-Driven Solutions

A testament to the prowess of systems designed and constructed by ibg NDT Systems, they currently inspect an array of components including ball studs, tie rods, fasteners, rollers, camshafts, gears, and many others. With precision-driven solutions, we revolutionize the path to quality control, illuminating the nuances in production that would otherwise remain hidden.
Contact Us
